LED Selection
Vehicle Parts Filter
FAQ
Forever-lens projector can only use Forever-lens logo chip due to optical and dimensional issues. Details are as below;
To change Forever-lens to full-color projector (or vise versa), entire lens barrel needs to be changed
| Forever-Lens | Standard Full-Color | |
| Projectors | Forever-Lens projectors | Standard LED Door projectors |
| Logo Chip Life Span | Forever | 3~6 months * (with free replacement) |
| Projection Color | White | Full Color |
| Material | Laser etched glass | Film |
| Custom-Made Logo | 1 to 100 pairs | 3-pairs or 50-pairs |
| Price | Higher | Lower |
| Design Collections | Fewer, growing | 50+ designs and growing |
| Switch to Forever-lens/STD Full Color logo chip | Certain projectors could switch to Full Color Chips with lens barrel LENB-STD | Certain projectors could switch to Forever-lens Chips with lens barrel LENB-Forever |
* Full-color standard logo chip life span depends on temperature and UV exposure. Hotter temperature and more often projection results shorter life span.
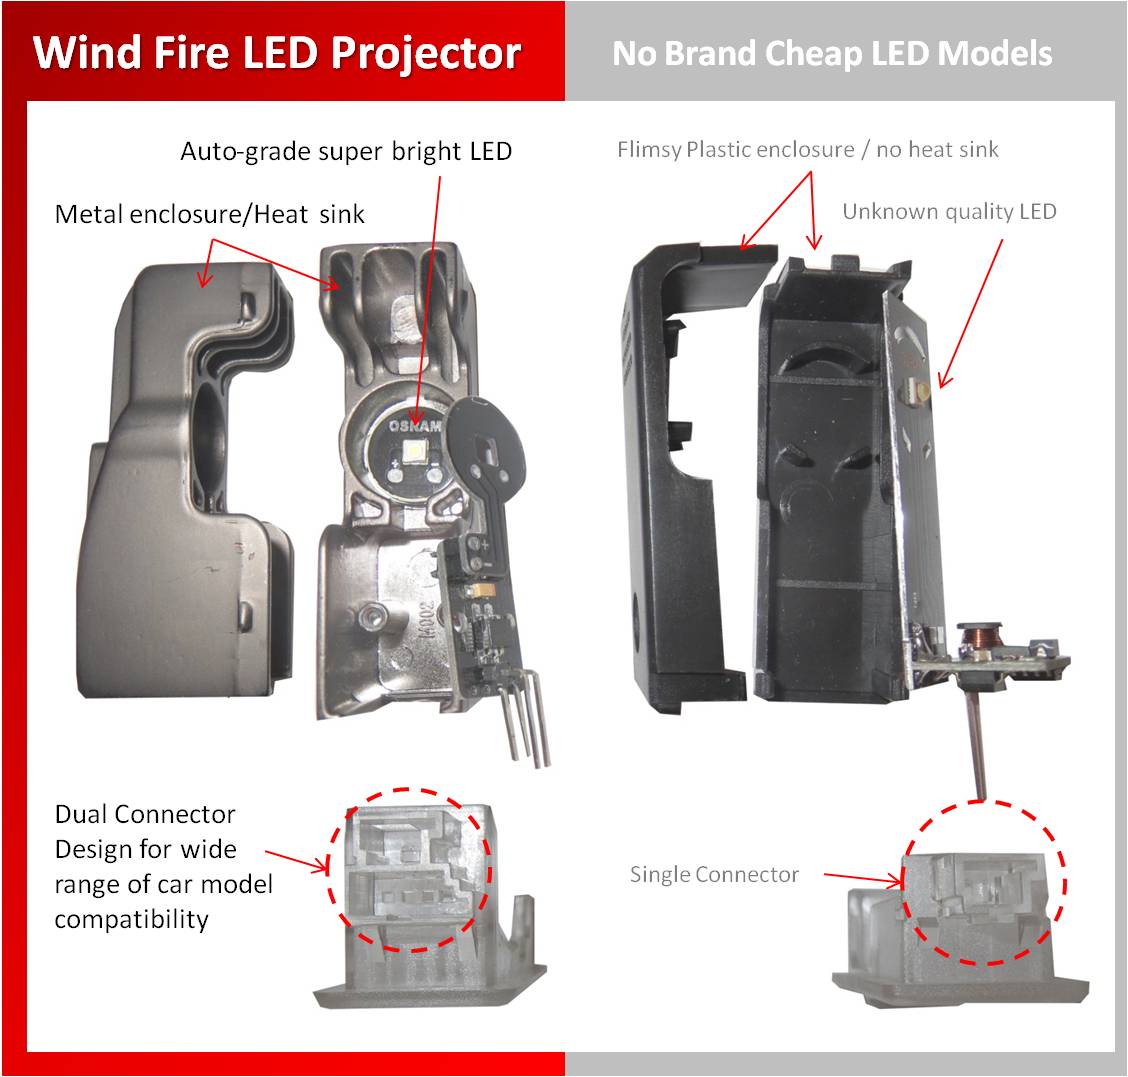
- some of them requires drilling or just sticking on door (very ugly)
- some of them is replacement but can’t change logo inserts
- some of them are no-drilling, changeable logo insert, but with “Toy grade” quality
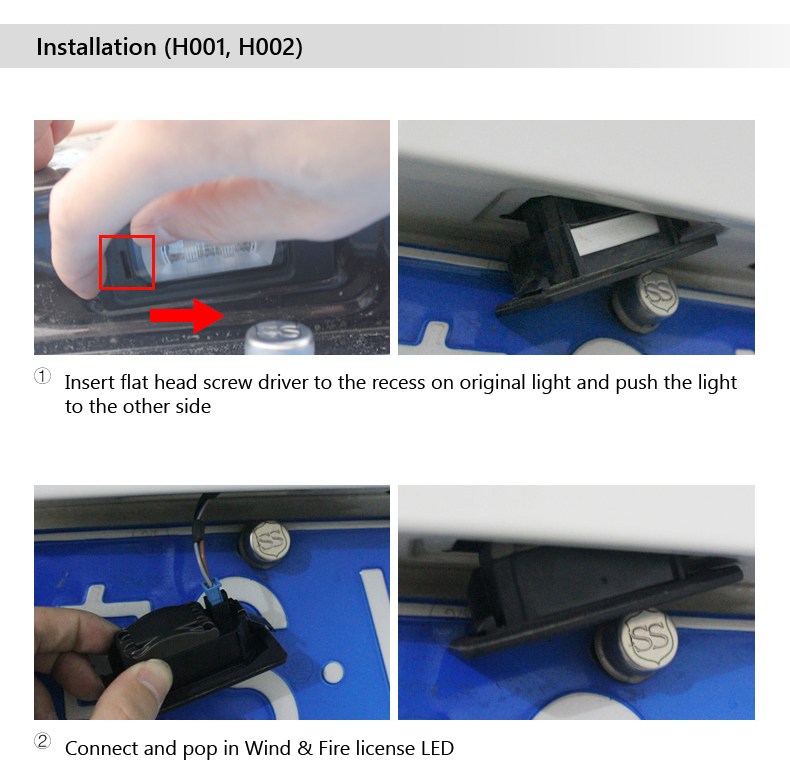
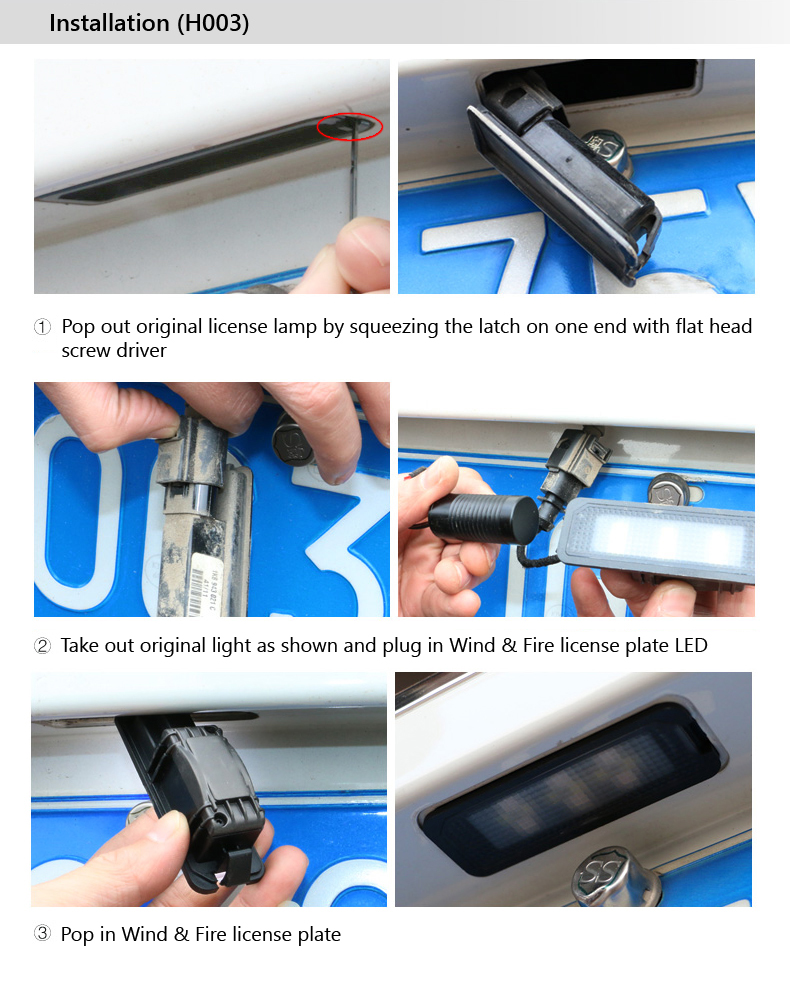
5 Easy Steps To Install Wind & Fire LED Projector
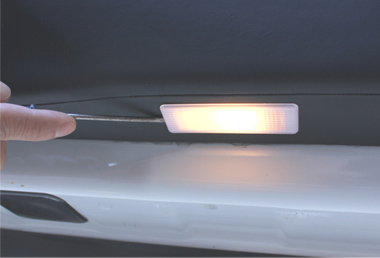
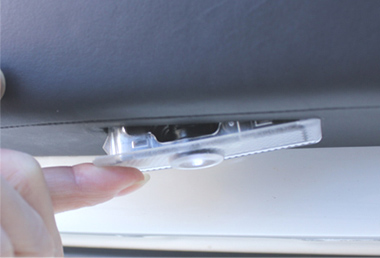
1
1. Slip a small flat type screwdriver at the side between the light and door. Tilt the screwdriver gently. |
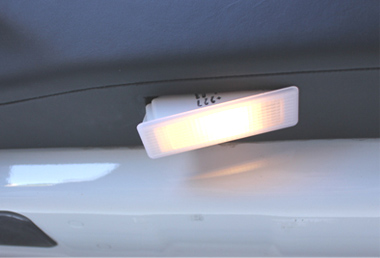
2
2. The original door light comes out like this |
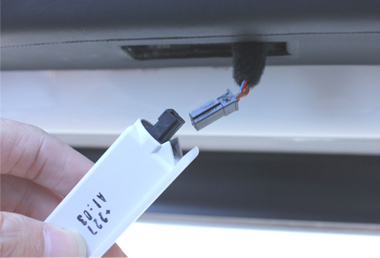
3
3. Unplug the original light |
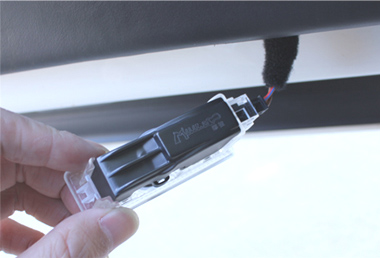
4
4. Plug Wind and Fire LED projector to the connector |
5
5. Place the LED car door projector back in position |
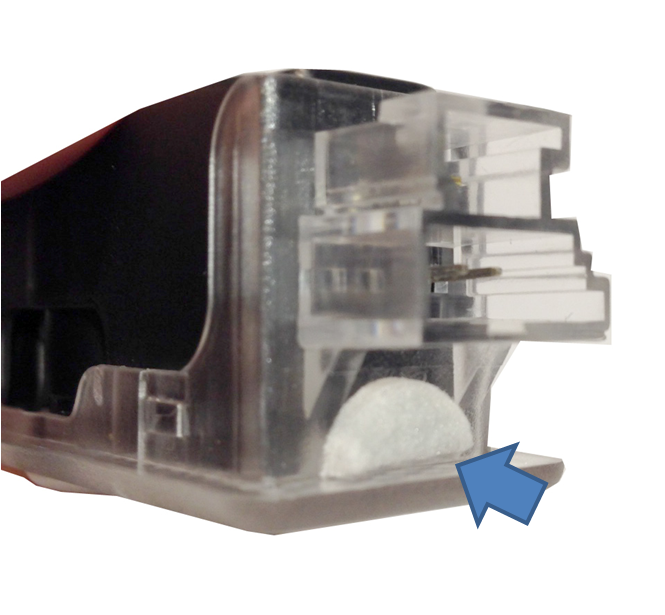
If you experience this issue, use a small pad (~2mm, from Home Depot, for small appliance feet or let us know and we can send you a filler). Simply stick it under the connector (e.g.M001/TE001, M002/TE002, C002…) or any where between LED and door hole edge
![]()

Don’t panic, our LED comes with lifetime free logo replacement. The coupon code was sent by email when the order is shipped. If you don’t have the code, send us email with your order number and we will give you the coupon code.
So then, pick up to 2 logo chips, checkout with the code and they will be free.
See the Lifetime free logo chips replacement policy
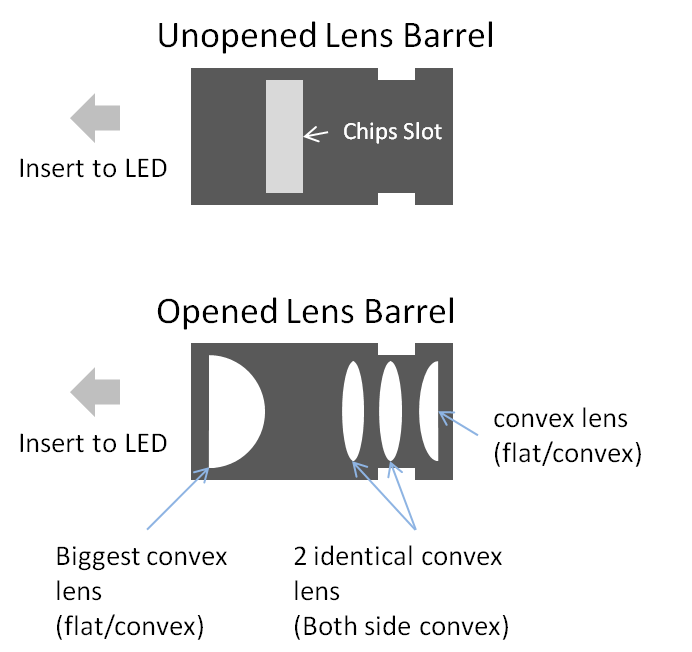
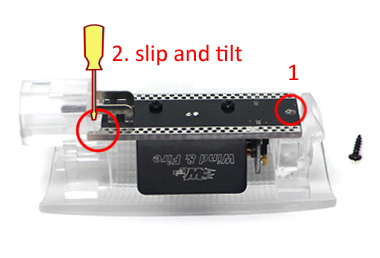 Step 1. Open D006/TE006 LED projector Step 1. Open D006/TE006 LED projector |
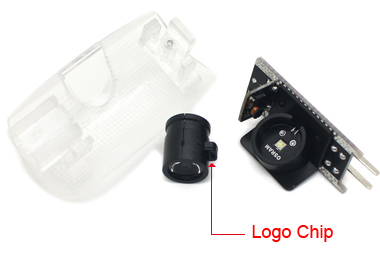 Step 2. Change logo chip Step 2. Change logo chip |
 Step 3. Put back lens barrel Step 3. Put back lens barrel |
 Step 4. Put back circuit to enclosure Step 4. Put back circuit to enclosure |
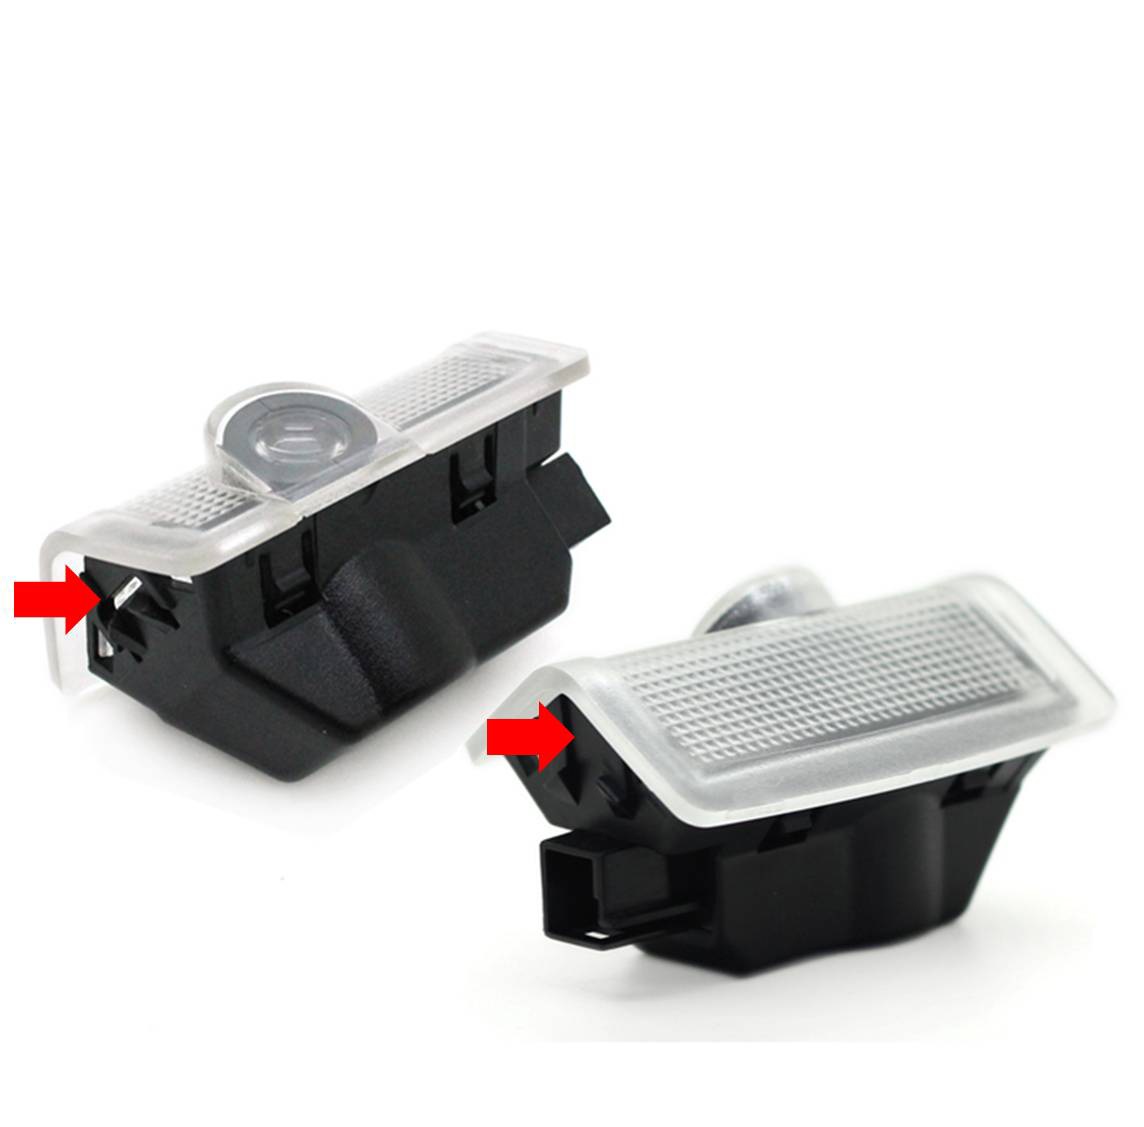
- Unscrew the circled screw as indicated in Step 1 picture
- Slip screw driver between circuit board and the plastic enclosure and tilt
- Take out the projection lens module and replace with new logo chip
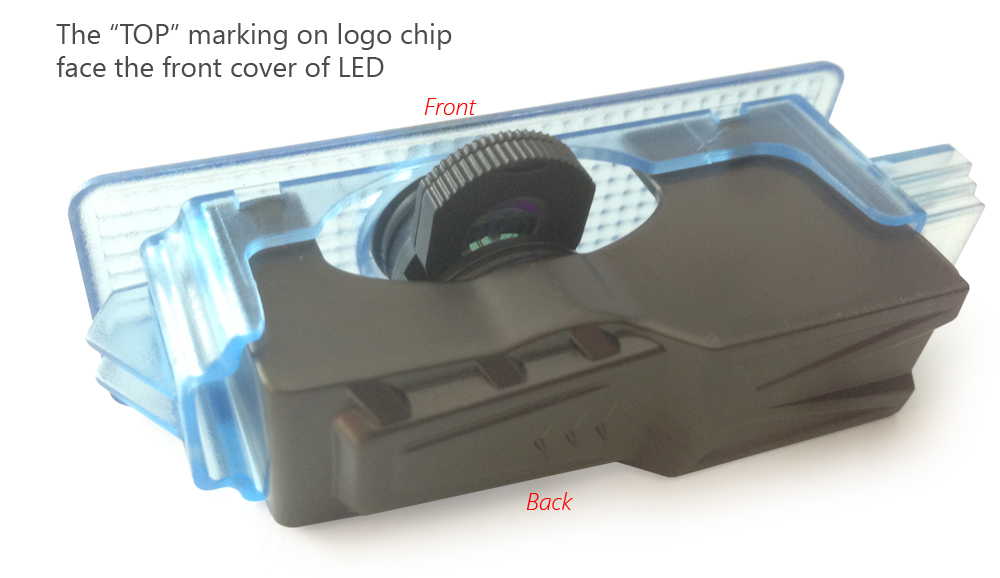
- Make sure new logo chip is place in the right direction. Otherwise the logo projected with be upside down
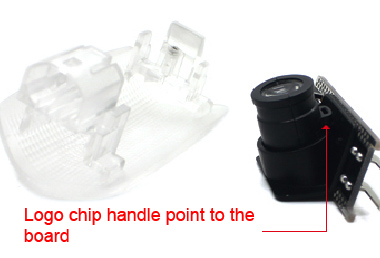
- Put the lens module back to board with the logo chip handle point to the board
- Assemble the board with the enclosure
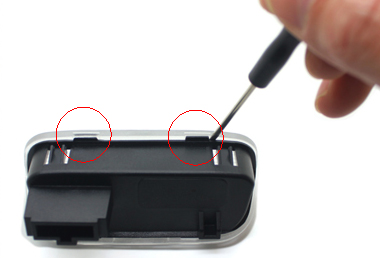 1. Open D001 (VW, Porche) LED 1. Open D001 (VW, Porche) LED |
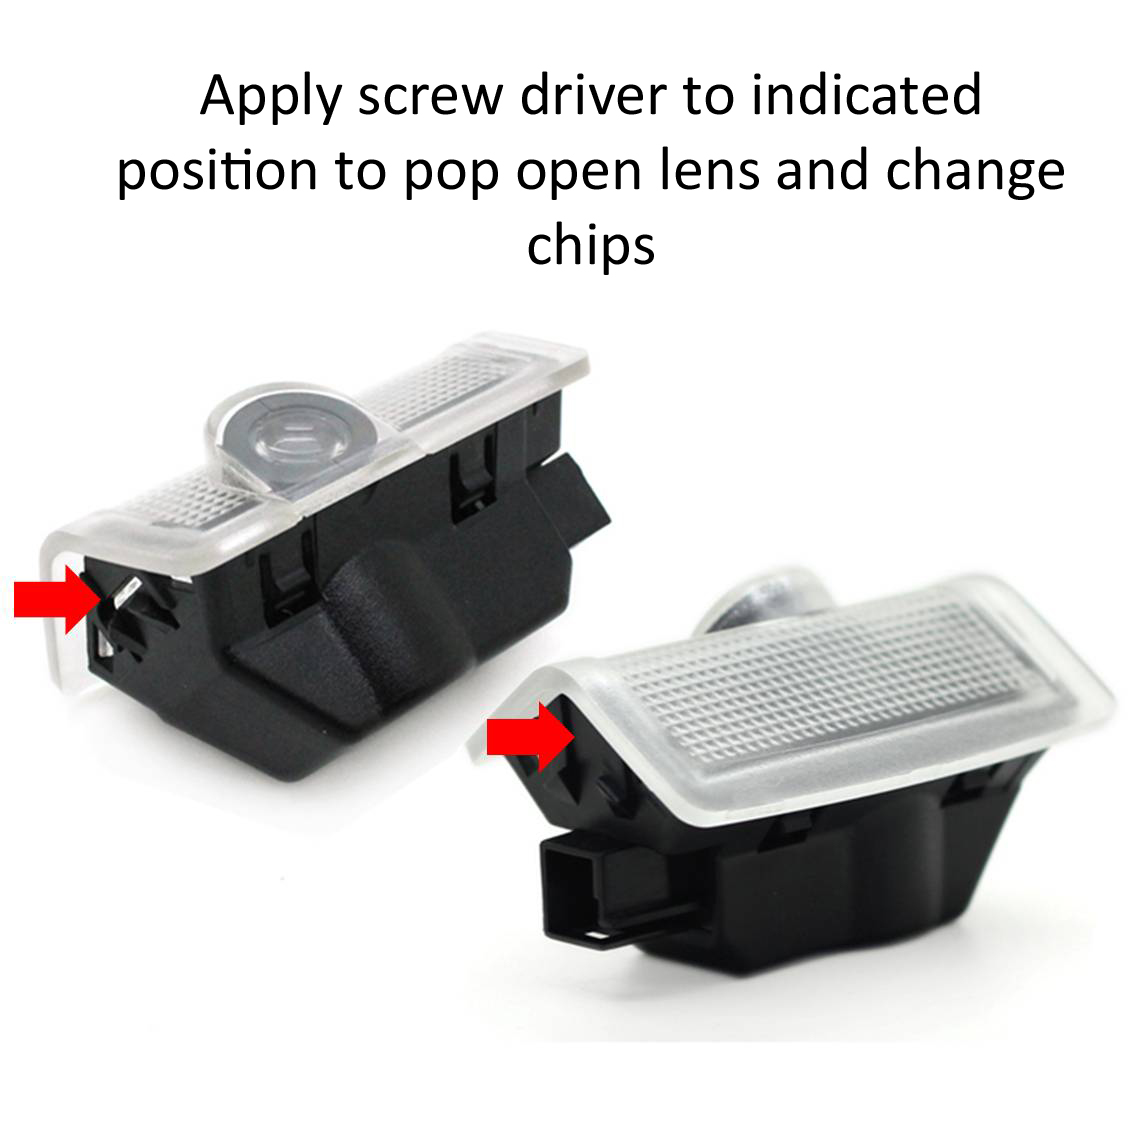 1. Open D007-B/TE007-B (Mercedes Benz) LED 1. Open D007-B/TE007-B (Mercedes Benz) LED |
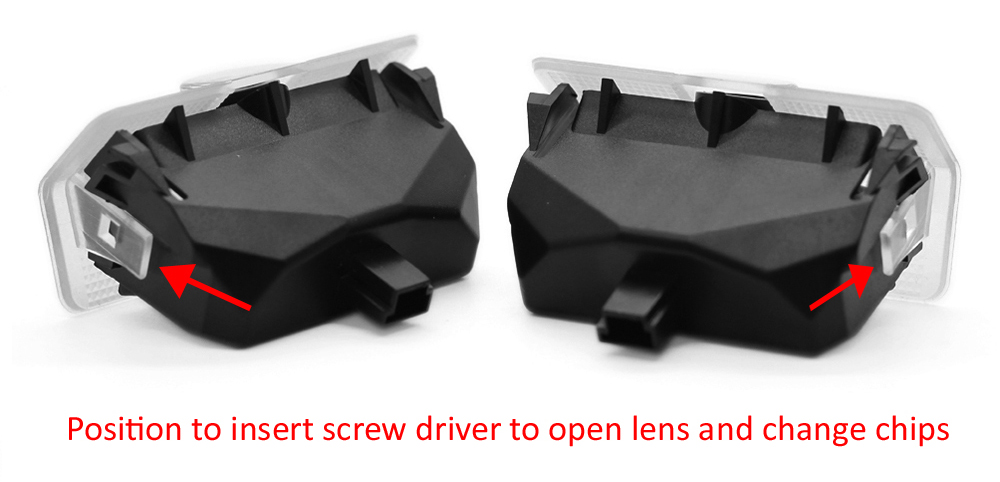 1. Open D007-C (Mercedes Benz) LED 1. Open D007-C (Mercedes Benz) LED |
 change logo chip step 2 change logo chip step 2 |
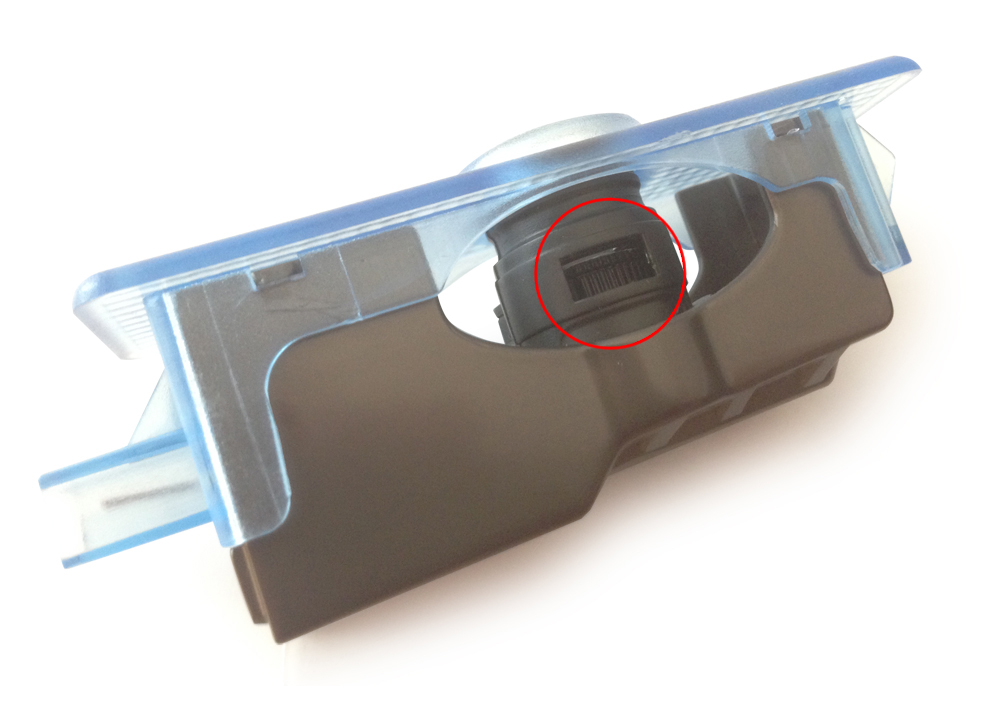
- Use small flat type screwdriver or key shape tool (in box) to slip and tilt gently close the latches (circled in red in step 1). DON’T break the latches
- Pull out the logo chip with the flat type screwdriver and replace new chip
- Make sure new logo chip is place in the right direction. Otherwise the logo projected with be left-right reversed.
- When you put the chip to projector slot, both the back of the project and the logo chip upright image (non-reversed) should face you.
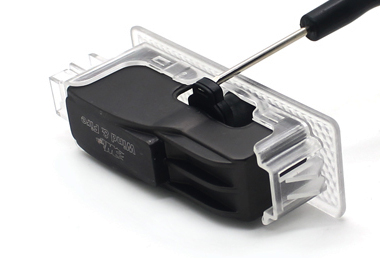
change logo chip for D005, M001/TE001, M002/TE002
- Use a small flat type screwdriver to pull out the logo chip
- Replace with new logo chip.
- Make sure new logo chip is place with the right direction. Otherwise the logo projected with be left-right reversed.
- When you put the chip to projector slot, both the back of the project and the logo chip upright image (non-reversed) should face you.
| Open D001 |
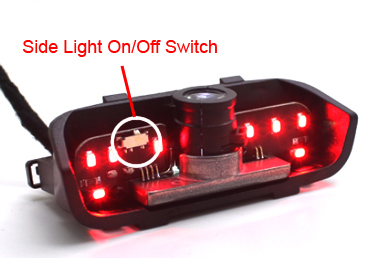 Switch to turn on/off D001 side light Switch to turn on/off D001 side light |
- Use small flat type screwdriver to slip and tilt gently close the latches (circled in red in step 1). DON’T break the latches
- Locate the small switch. switch to left to turn OFF, switch to right to turn ON the side lights